Connecting Tacklit to Xero
Connecting Tacklit to Xero
Important Tip before beginning:
Before connecting your Xero account to Tacklit, please ensure you have set up Xero first. Xero refreshes data into Tacklit daily, and therefore if something isn’t in place in Xero before trying to set up the mapping in Tacklit, it won’t be available as an option until the next day.
Next Steps:
Connecting Tacklit to Xero is simple;
- Log in as a Superuser
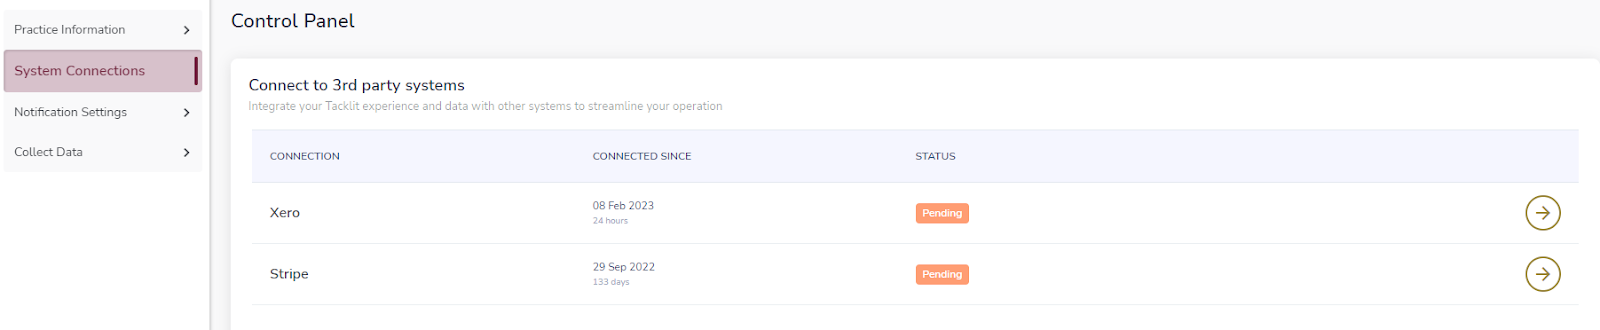
- Go to Control Panel
- System Integrations
- Select Xero form the Available integration menu
- Follow the prompts until you have successfully added Xero
Then:
Check the below Xero information is set up before proceeding to mapping the data in Tacklit. You can check this by ensuring all the below Xero screens have content.
1. Tax Rates
Xero:
Go to: Settings/Advanced Setting/Tax RatesSet up tax rates before mapping into Tacklit 'fields'Tacklit - Fields mapping:
On the Fields tab of the Tacklit Xero mapping, below is the information pushed to Xero on the generation of every invoice. In addition you are also able to select additional information from Tacklit to push across to Xero; Tax rate, and Customers name are mandatory to complete.
IMPORTANT: You will also need to select Invoice number and map that across to Tacklit Invoice ID (see below screenshot). If the Invoice ID isn't created and you create a manual invoice, the syncing between Tacklit and Xero fails for that client for all future invoices.

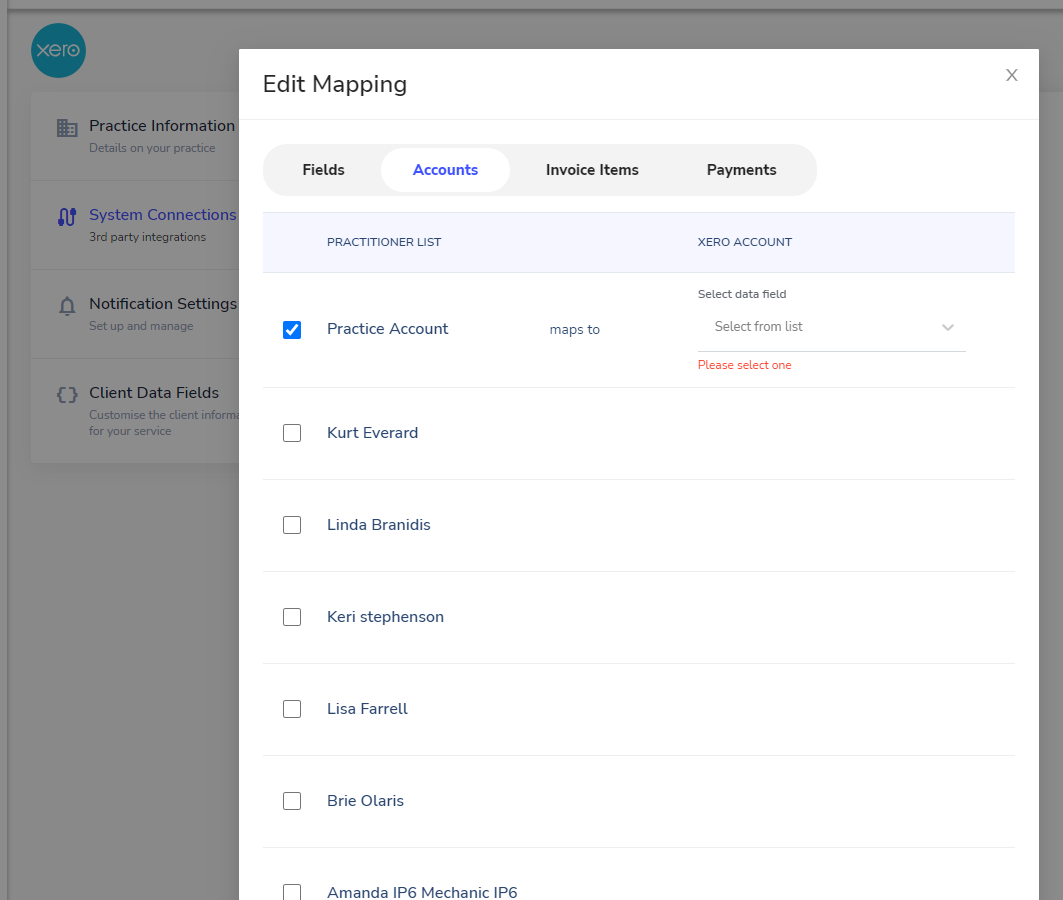
2. Accounts
Xero:
Go to: Accounts/Chart of Accounts/Revenue

Tacklit Accounts mapping :
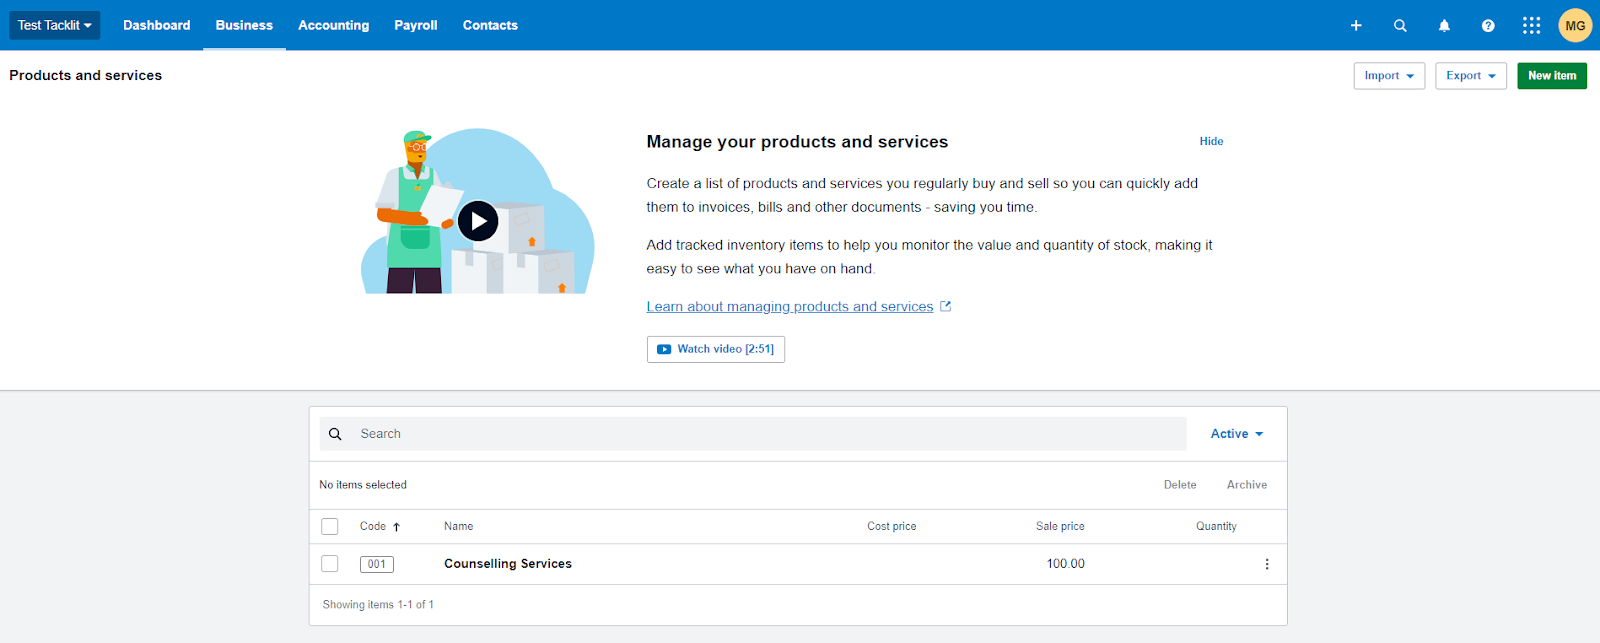
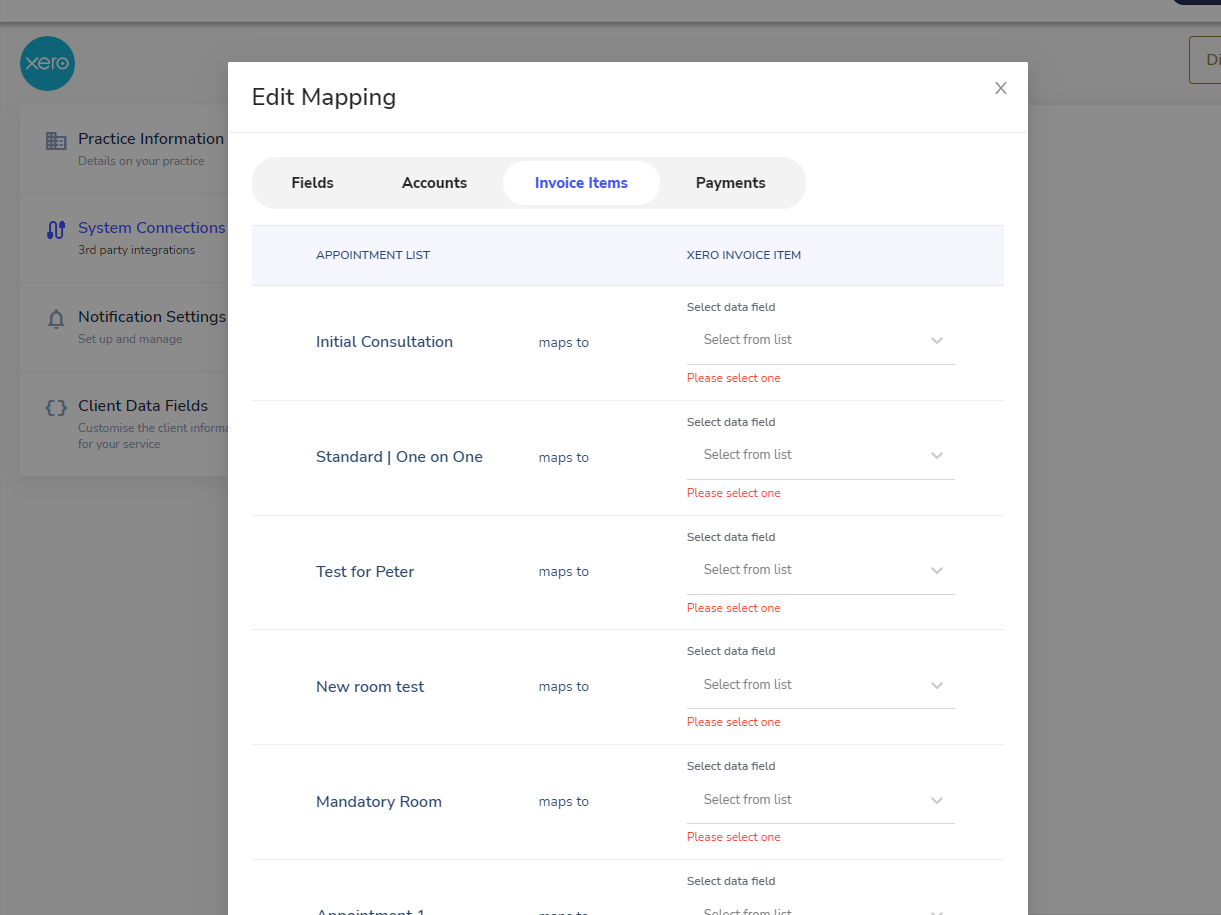
3. Products and Services
Xero
Go to: Business/Products and Services/Add item
Tacklit Invoice mapping:
This tab must be completed.
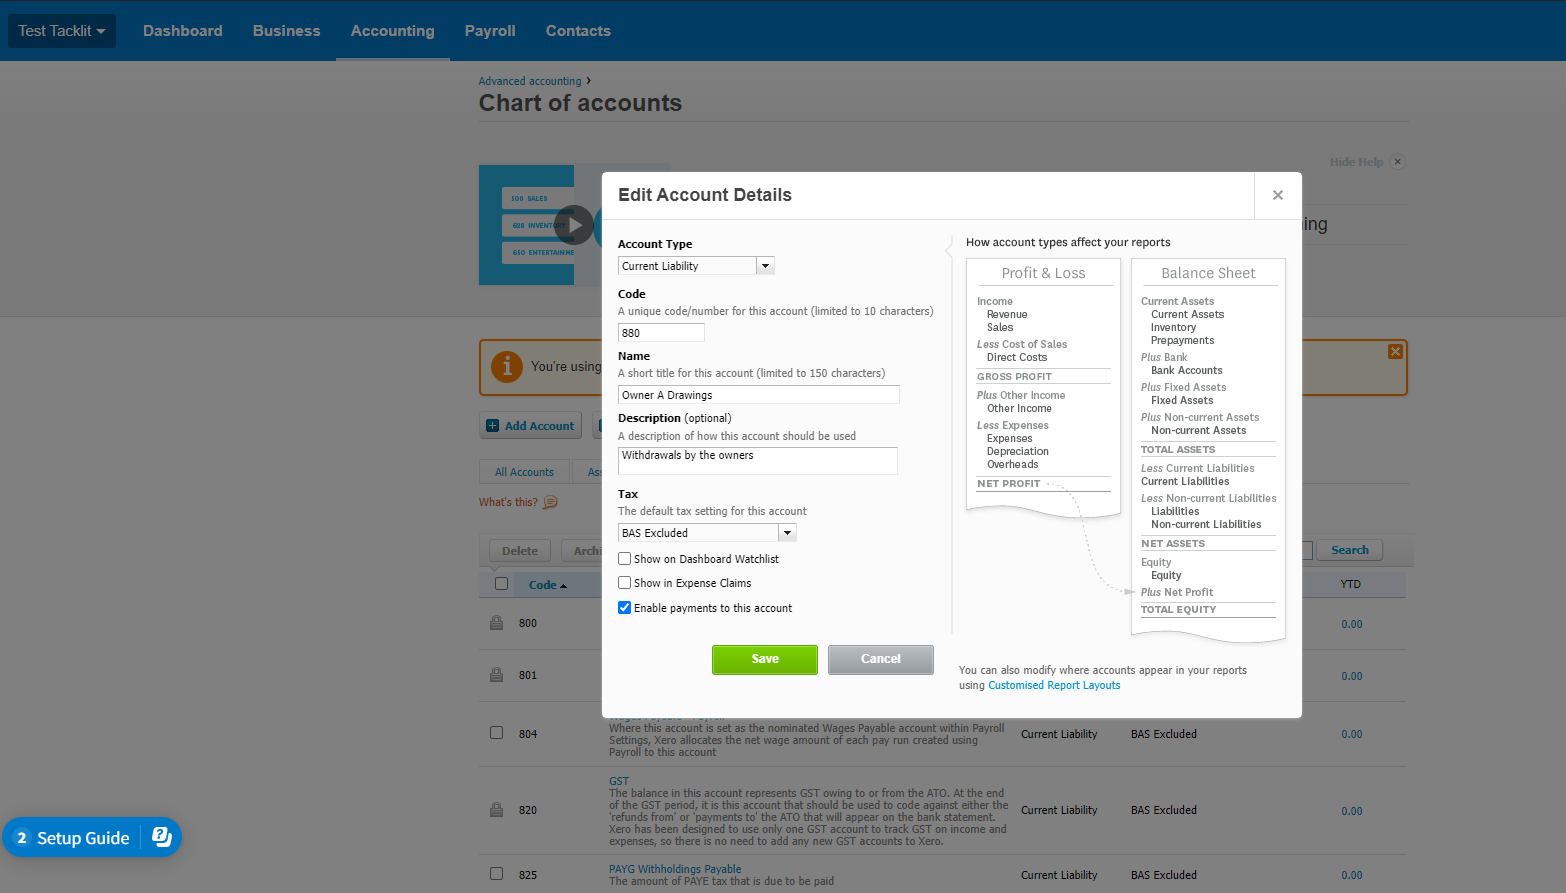
4. In order to Map these field in Tacklit, go to the following Xero screen:
Xero:
Go to: Accounting/Chart of Accounts/Liabilities or AssetsItems with the 'create payments to the account' checked will be available for selection in the Payment Mapping in Tacklit.
Tacklit Payments Mapping:
A payment account must be selected.

- Every invoice when marked as confirmed paid in Tacklit, sends the status to Xero to go into the selected Payment account.
- In Xero, if marking invoice as Paid, doesn’t push back to Tacklit.
- Any payment methods are all going to Default Payment account
Setup and Completion:
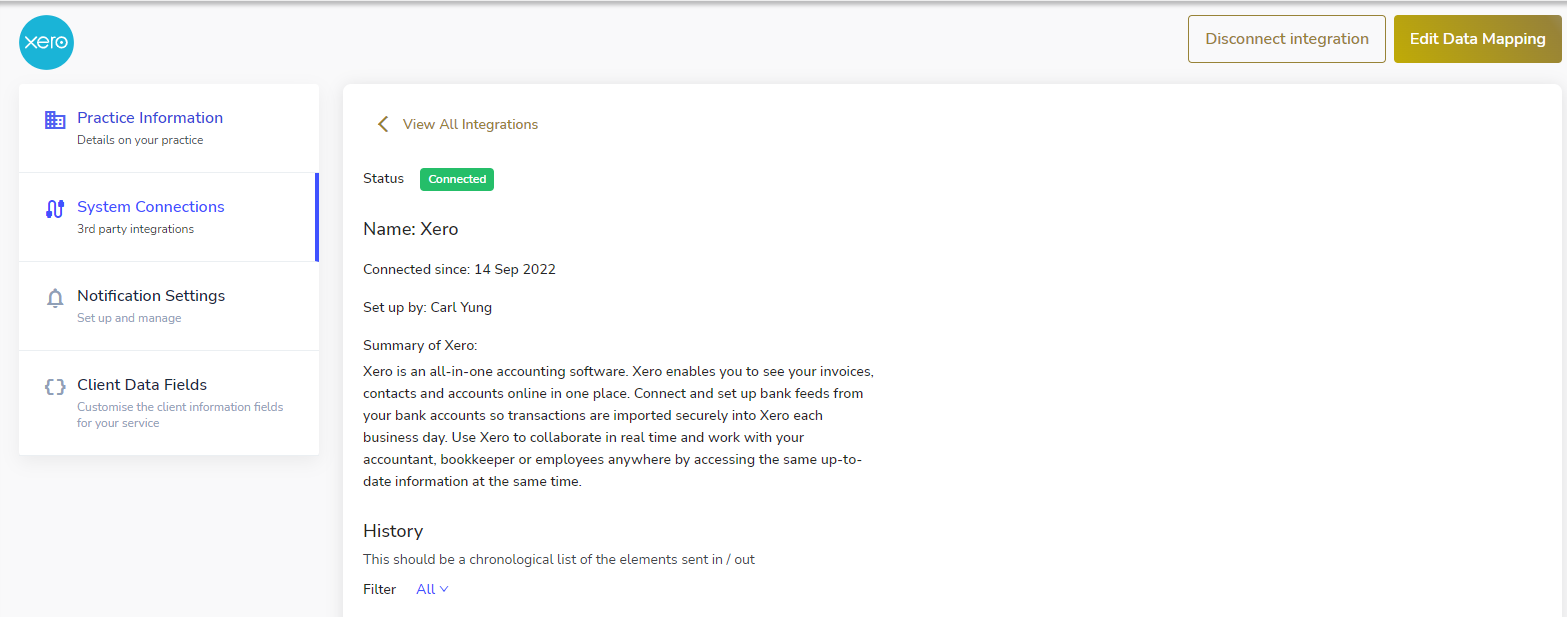
- Once Xero is setup, go to Tacklit and select Xero in the connection menu.
- Click 'Edit Data Mapping' in top right corner and proceed with the mapping.
- Once all Tacklit mapping has been completed, click Save and the status will show as 'connected'.
- Any invoiced 'Generated' from here on will map into Xero.
Examples:
This is how the Tacklit setup maps to Xero entries. See the corresponding a-f mapping in the below screenshots:


